I had some fantastic stamps a while back and have finally had the chance to use them on a card. May I introduce Victoria and Otto from the brilliant Brian Kesinger.
This steampunk card was made for a friend of mine who has very similar taste to me so I knew she would love it.
I stamped each image onto white card and gave each image a wash effect colour using distress ink, then mounted them onto purple card.
I cut a piece of the same purple card slightly smaller than my card blank, then a piece of green slightly smaller than that. I stamped the tentacle onto each side of the green card using Versamark and embossed with clear powder, this made the image slightly darker than the background card without overtaking the whole card.
After sticking the two pieces of card to my blank I placed the stamped images in the centre so the tentacles appear to be slithering out from behind them.
Next I cut two Cheery Lynn steampunk corners from white card using Versamark ink and metallic brass WOW embossing powder to create the metal effect.
On the top right hand corner I stuck three metal cogs and on the bottom left hand corner I stuck two metal cogs and three paper flowers.
For more adventures of Victoria and Otto you can visit Brian Kesinger's website here
Showing posts with label Steampunk. Show all posts
Thursday, 7 April 2016
Thursday, 19 June 2014
Steampunk in Lace
As some of you will know I am a big Steampunk fan (any excuse to buy a cog or two). So for my birthday last month I received what I can only describe as a strange flat packed present. When I opened it I had a Huh! look on my face apparently. The packet was a pile of paper some purple lacy things and some nuts and bolts (I kid you not) I was told it was a make your own steampunk goggle kit!
When I opened it this explanation wasn't much clearer.
At first glance the instructions looked complex (no colour pictures) so I politely thanked my friend and put the pieces away to be tackled at a later date. So today was that date and I am now wondering what I was so afraid of.
The first thing was to fasten the lenses to the frame using five little screws (sounds difficult doesn't it), then you fasten the two frames together using the bridge (are you with me so far), then you add two pieces of ribbon! Yes it's that complicated!!!!!!!!
This is a straight on view of the lenses (please excuse the dodgy pic but do you know how difficult it is to photograph something you can see through?
This is a top view, the detail is amazing and looks fantastic when completed.
You can find this kit and more at Dragonswann Designs facebook page or Dragonswann Designs ebay.
When I opened it this explanation wasn't much clearer.
At first glance the instructions looked complex (no colour pictures) so I politely thanked my friend and put the pieces away to be tackled at a later date. So today was that date and I am now wondering what I was so afraid of.
The first thing was to fasten the lenses to the frame using five little screws (sounds difficult doesn't it), then you fasten the two frames together using the bridge (are you with me so far), then you add two pieces of ribbon! Yes it's that complicated!!!!!!!!
This is a straight on view of the lenses (please excuse the dodgy pic but do you know how difficult it is to photograph something you can see through?
This is a top view, the detail is amazing and looks fantastic when completed.
You can find this kit and more at Dragonswann Designs facebook page or Dragonswann Designs ebay.
Friday, 24 January 2014
The brass tortoise
As you know there has been a theme to my last couple of posts thanks to Steampunkery by Christi Friesen.
This is another piece inspired by the characters you can find in the book. I was not as happy with this piece as I was with the others but I am using it as prototype for a better tortoise.
Tortie was made from brown Sculpey lightly dusted with mica powder to create the metallic finish. I used a clay tool to add the shell effect on the top. He has several watch parts on his body including around his eye. I added a 'leather' strap to give him a more steampunk feel.
Next time I think I will make him a little rounder, after cooking he seemed to have become a little flat.
I am currently working on some more ideas along the steampunkery lines so watch this space.
This is another piece inspired by the characters you can find in the book. I was not as happy with this piece as I was with the others but I am using it as prototype for a better tortoise.
Tortie was made from brown Sculpey lightly dusted with mica powder to create the metallic finish. I used a clay tool to add the shell effect on the top. He has several watch parts on his body including around his eye. I added a 'leather' strap to give him a more steampunk feel.
Next time I think I will make him a little rounder, after cooking he seemed to have become a little flat.
I am currently working on some more ideas along the steampunkery lines so watch this space.
Labels:
mica powder,
Sculpey,
Steampunk,
Steampunkery,
watch parts
Thursday, 23 January 2014
Hello little octopus
This is another creation inspired by Steampunkery by Christie Friesen.
I apologise for the photograph but for some reason I had real problems trying to a decent image.
I had lots of fun making this octopus, I had to make his legs separately from the body as well as his top hat.
I added suckers to the bottom of his tentacles and watch parts on the top, as well as on his eyes and his hat. Then the finishing touch of purple/blue mica powder to give him a shiny finish.
I was a little worried about how this would turn out as this was my own idea (no patterns to follow), but I do like him he has his own little character.
I apologise for the photograph but for some reason I had real problems trying to a decent image.
I had lots of fun making this octopus, I had to make his legs separately from the body as well as his top hat.
I added suckers to the bottom of his tentacles and watch parts on the top, as well as on his eyes and his hat. Then the finishing touch of purple/blue mica powder to give him a shiny finish.
I was a little worried about how this would turn out as this was my own idea (no patterns to follow), but I do like him he has his own little character.
Labels:
mica powder,
Sculpey,
Steampunk,
Steampunkery,
watch parts
Wednesday, 22 January 2014
A little steampunkery
Last year I received a fantastic book called Steampunkery by Christi Friesen.
So I decided to have a go at making a few little steampunk creatures. Here is my first attempt, I was quiet pleased with him actually.
I've used different colours of Sculpey clay to create this cute little chameleon. After I had put together the body I used a little gold mica powder to give the armor on his tail a bit of a shine. After he was assembled I added the finishing touches with some small watch parts.
I was so pleased with this little guy I upscaled slightly to make him a friend.
So I decided to have a go at making a few little steampunk creatures. Here is my first attempt, I was quiet pleased with him actually.
I was so pleased with this little guy I upscaled slightly to make him a friend.
Labels:
Christi Friesen,
mica powder,
Sculpey,
Steampunk,
Steampunkery,
watch parts
Sunday, 29 September 2013
Top of the morning (or at least evening)
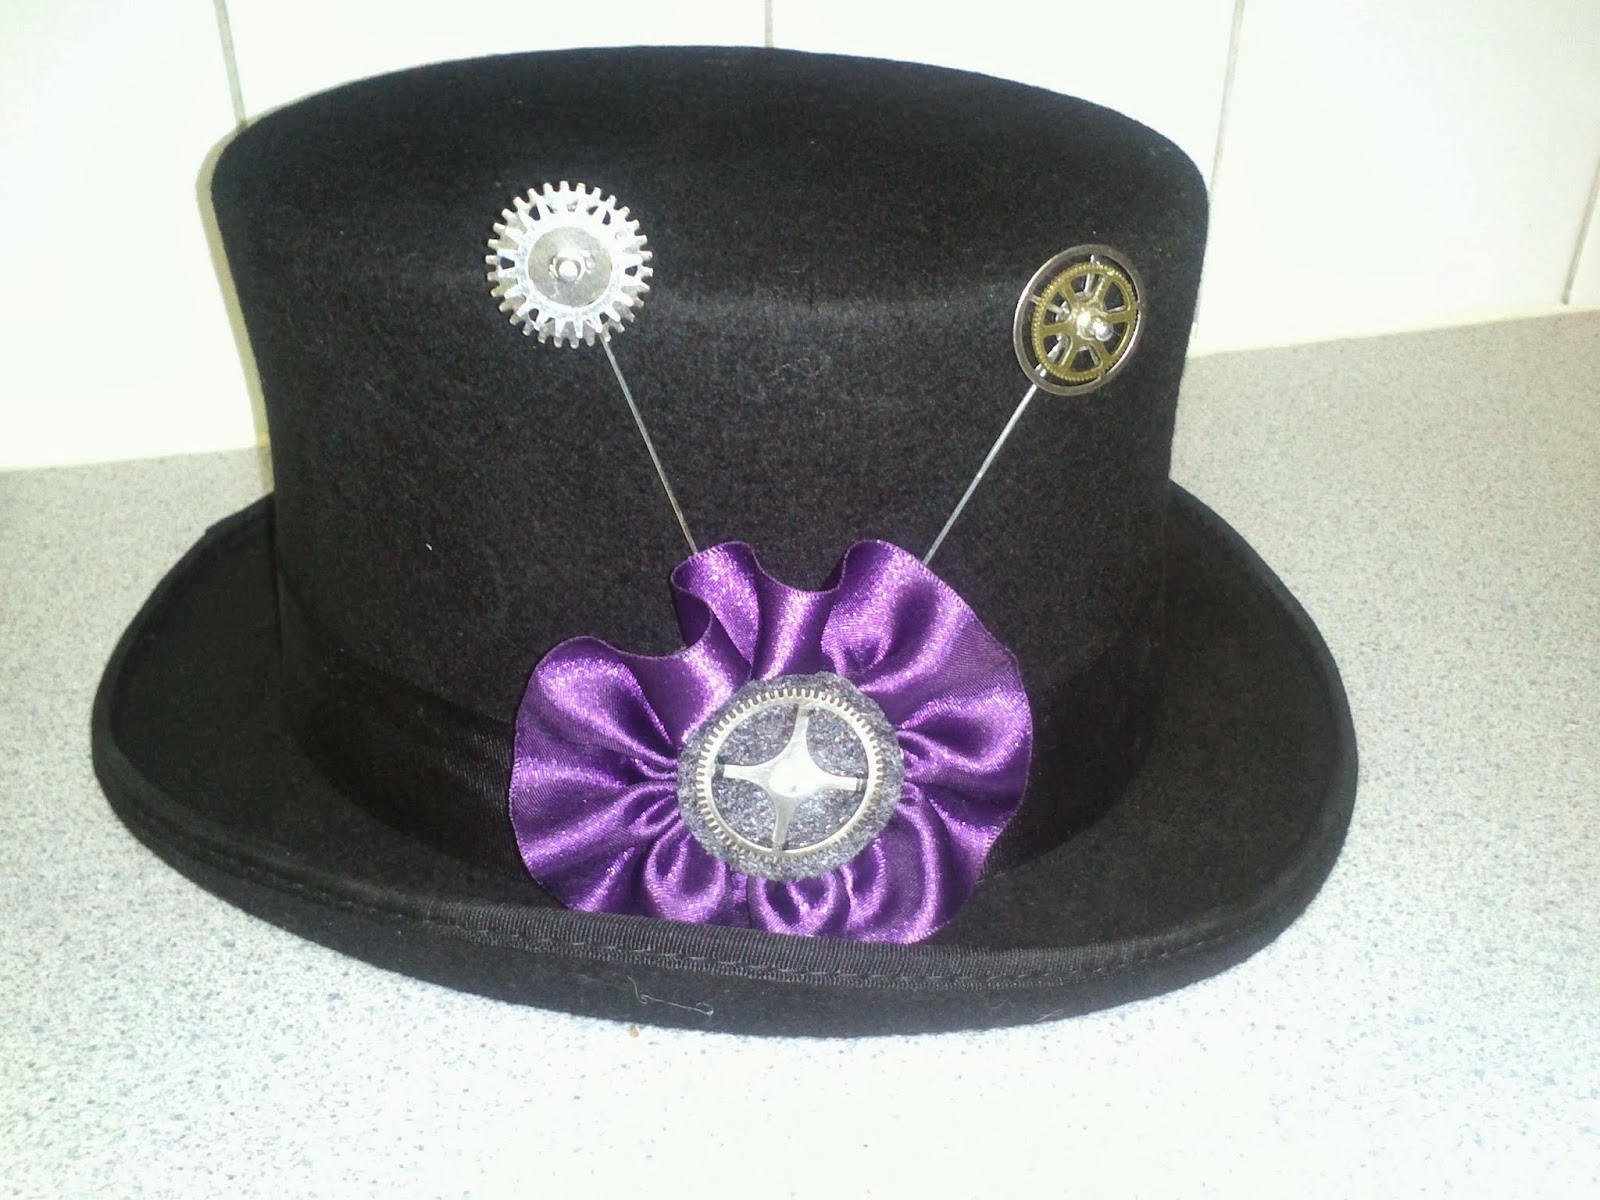
It was our friends wedding yesterday, they had a masquerade theme and everyone has been busily looking for something cool to wear. So I went with a slight twist on the theme with a steampunk outfit. This is my top hat complete with cog hat pins and a cog/ribbon rosette. The first pic is a side shot and the second one is a full frontal. I had lots of people telling me how cool i looked all night. I'm just glad I pulled it all off.
Monday, 18 June 2012
Steampunk Top Hat
This is my little Steampunk top hat pendant. It's a Studio 490 top hat with tiny watch parts stuck on to it with matt accents. I then stuck a black metal bail onto the back and hung it on a black cord. The picture does make look cogs look quiet bright but in natural light they are a lot duller.
I just love my little hat, it's so cute.
Thursday, 5 January 2012
Steampunked phone cover
This is how my altered phone cover started it's life. It's a really nice purple leather effect slide in phone cover.
On one side I stamped a steampunk design corner from the Inkadinkado clear stamp set, using StazOn ink. I love that this fitted perfectly .This is the reverse of the cover on to which I stamped the hot air balloon from the same Inkadinkado steampunk set.
Subscribe to:
Posts (Atom)